最近经常碰到一种场景,手机复制粘贴一些文本等内容到电脑,或者电脑发到手机。
实现这个功能的方案很多,但是基本上要么是手机连上电脑,要么两端各安装一个什么应用,局限性还是很大。于是就有了一个想法,直接自己搞一个类似聊天室的网站不就好了,手机扫个码就能打开,电脑上只要有浏览器就行。websocket把编辑的内容实时同步到服务器,多方便😁——emmm….啊这,这不就是谷歌文档么😅。。。那就当自己玩玩吧,技多不压身嘛~而且自己搭的服务器,这些简单的功能也不用搞什么复杂的鉴权,用起来也方便~~
既然明确了目的就是玩,那就玩点新东西好了,首先尝试下vite:
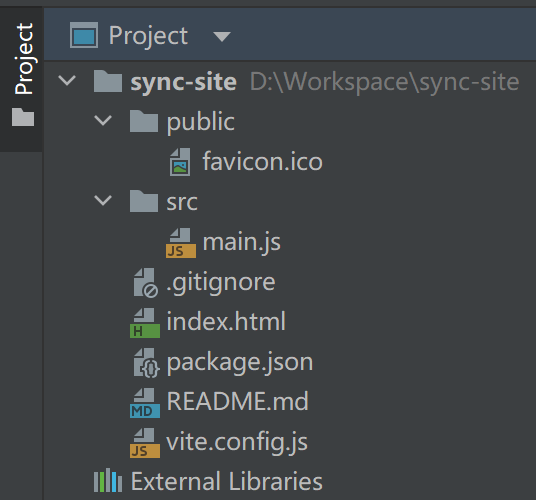
创建vite工程sync-site
1 npm init vite@latest sync-site --template vue
这里我们并不需要vue,但是新的vite必须要指定一个框架,好在不会自动帮我们安装依赖,我们可以进入sync-site目录,手动去掉不必要的文件和代码。
删除vue相关的文件和代码 ①移除package.json里vue相关的依赖
1
2
3
4
5
6
7
8
9
10
11
12
13
14
15
{ "name" : "sync-site" , "private" : true , "version" : "0.0.0" , "scripts" : { "dev" : "vite" , "build" : "vite build" , "preview" : "vite preview" } , "dependencies" : { } , "devDependencies" : { "vite" : "^2.8.0" } }
②删除components目录和其他.vue后缀的文件
③vite.config.js移除vue相关代码
1
2
3
import { defineConfig } from 'vite' export default defineConfig ({})
④main.js里的代码改为
1 document .getElementById ('app' ).innerHTML = 'Hello Vite!'
⑤安装依赖并启动vite开发服务器
如果页面上看到“Hello Vite!”,第一步配置vite就成功了
配置富文本编辑器Quill ①安装最新版的quill
②main.js中引入并配置quill的主题样式为snow
当前quill版本是1.3.7,snow主题的样式文件地址为https://cdn.quilljs.com/1.3.7/quill.snow.css ,我下载到了本地。修改main.js如下:
1 2 3 4 5 6 7 8 9 10 11 12 13 14 15 16 17 18 19 20 21 22 import Quill from 'quill' import './quill.snow.css' const toolbar = [ ['bold' , 'italic' , 'underline' , 'strike' ], [{'header' : [1 , 2 , 3 , 4 , 5 , 6 , false ]}], [{'list' : 'ordered' }, {'list' : 'bullet' }], [{'indent' : '-1' }, {'indent' : '+1' }], [{'size' : ['small' , false , 'large' , 'huge' ]}], [{'color' : []}, {'background' : []}], [{'font' : []}], [{'align' : []}], ['clean' ], ] const $app= document .querySelector ('#app' )const quill = new Quill ($app, { modules : { toolbar, }, theme : 'snow' , })
配置Express服务器 ①安装express依赖
②在src下创建server.js,使用static中间件来托管dist目录下的静态文件
③在3000端口启动服务
1 2 3 4 5 6 7 8 9 10 11 const http = require ('http' )const path = require ('path' )const express = require ('express' )const app = express ()const httpServer = http.createServer (app)app.use (express.static (path.join (__dirname, '../dist' ))) httpServer.listen (3000 , function ( console .log ('\x1b[32m%s\x1b[0m' , '服务启动成功' ) })
ps:
① 第五行使用node的http模块创建http服务器,第九行的 server.listen(3000…可以替换为app.listen(3000…,如果看下express的listen函数源码 ,会发现两者并没有什么区别。之所以不直接使用express的listen函数是因为后面我们的websocket也要使用到http server。
② 第十行的 \x1b[32m%s\x1b[0m 中,%s是占位符,代表后面的字符串。\x1b[32m和\x1b[0m表示打印前景色是绿色的字符,具体原理见前文:控制台与终端输出带样式文本原理及实现 。
修改vite配置文件vite.config.js监听vite的build行为 1 2 3 4 5 6 7 8 import {defineConfig} from 'vite' export default defineConfig ({ build : { watch : {} } })
开启node服务 3000端口号上打开页面,可以看到quill被成功引入。
配置socket.io ①安装socket.io和socket.io-client依赖
index.html的app改为editor,并修改main.js:
1 2 3 4 5 6 7 8 9 10 11 12 13 14 15 16 17 18 19 20 21 22 23 24 25 26 27 28 29 30 31 32 33 34 35 36 37 38 39 40 41 import Quill from 'quill' import './quill.snow.css' import io from 'socket.io-client' const toolbar = [ ['bold' , 'italic' , 'underline' , 'strike' ], [{'header' : [1 , 2 , 3 , 4 , 5 , 6 , false ]}], [{'list' : 'ordered' }, {'list' : 'bullet' }], [{'indent' : '-1' }, {'indent' : '+1' }], [{'size' : ['small' , false , 'large' , 'huge' ]}], [{'color' : []}, {'background' : []}], [{'font' : []}], [{'align' : []}], ['clean' ], ] const $editor = document .querySelector ('#editor' )const quill = new Quill ($editor, { modules : { toolbar, }, theme : 'snow' , }) const socket = io ()socket.on ('welcome' , function (word ) { console .log ('welcome:' , word) }) socket.on ('broadcast' , function (word ) { console .log ('broadcast:' , word) }) socket.on ('quill-sync' , function (contentStr ) { contentStr && quill.setContents (JSON .parse (contentStr)) }) quill.on ('text-change' , function (delta, oldDelta, source ) { if (source === 'user' ) { const content = quill.getContents () socket && socket.emit ('quill-sync' , JSON .stringify (content)) } })
修改server.js:
1 2 3 4 5 6 7 8 9 10 11 12 13 14 15 16 17 18 19 20 21 22 23 24 25 26 27 28 29 const http = require ('http' )const path = require ('path' )const express = require ('express' )const app = express ()const httpServer = http.createServer (app)const {Server : SocketServer } = require ('socket.io' )const io = new SocketServer (httpServer)app.use (express.static (path.join (__dirname, '../dist' ))) httpServer.listen (3000 , function ( console .log ('\x1b[32m%s\x1b[0m' , '服务启动成功' ) }) let _contentStr = '' io.on ('connection' , (socket ) => { socket.emit ('welcome' , '你好,' + socket.id ) socket.broadcast .emit ('broadcast' , socket.id + '加入' ) socket.emit ('quill-sync' , _contentStr) socket.on ('quill-sync' , function (contentStr ) { _contentStr = contentStr socket.broadcast .emit ('quill-sync' , contentStr) }) })
这时候,当你第一次打开http://localhost:3000的时候,会在控制台收到欢迎信息;新标签页再次打开该地址,原页面会收到新加入用户的信息;修改编辑器内容,打开的多个页面会同时收到同步的内容。
增加房间号与接口鉴权 如果你想把这个页面共享给其他伙伴,难免就涉及到socket连接的分配与鉴权,这里为了方便,直接使用http的Basic鉴权。
1. 安装sass模块(即dart sass)
2. 添加src目录添加main.scss:
1 2 3 4 5 6 7 8 9 10 11 12 13 14 15 16 17 18 19 20 21 22 23 24 25 26 27 28 29 30 31 32 33 34 35 36 37 38 39 40 41 42 43 44 45 46 47 48 49 50 51 52 53 54 55 56 57 58 59 60 61 62 63 * { padding : 0 ; margin : 0 ; } html , body { width : 100% ; height : 100% ; } body { display : flex; flex-direction : column; } .ql-toolbar { width : 100% ; height : auto; z-index : 1 ; flex : 0 ; } .ql-editor { height : 100% ; box-sizing : border-box; } #status-bar { flex : 0 ; #btn-join { display : inline-block; } #num-room { display : none; } #btn-leave { display : none; } &.joined { #btn-join { display : none; } #num-room { display : inline-block; } #btn-leave { display : inline-block; } } } #editor { flex : 1 ; }
3. 修改index.html:
1 2 3 4 5 6 7 8 9 10 11 12 13 14 15 16 17 18 <!DOCTYPE html > <html lang ="en" > <head > <meta charset ="UTF-8" /> <meta name ="viewport" content ="width=device-width, initial-scale=1.0" /> <title > Vite App</title > </head > <body > <div id ="status-bar" > <button id ="btn-join" > 进入房间</button > <span id ="num-room" > </span > <button id ="btn-leave" > 离开房间</button > </div > <div id ="editor" > </div > <script type ="module" src ="/src/main.js" > </script > </body > </html >
4. 修改main.js:
1 2 3 4 5 6 7 8 9 10 11 12 13 14 15 16 17 18 19 20 21 22 23 24 25 26 27 28 29 30 31 32 33 34 35 36 37 38 39 40 41 42 43 44 45 46 47 48 49 50 51 52 53 54 55 56 57 58 59 60 61 62 63 64 65 66 67 68 69 70 71 import Quill from 'quill' import './quill.snow.css' import './main.scss' import io from 'socket.io-client' const toolbar = [ ['bold' , 'italic' , 'underline' , 'strike' ], [{'header' : [1 , 2 , 3 , 4 , 5 , 6 , false ]}], [{'list' : 'ordered' }, {'list' : 'bullet' }], [{'indent' : '-1' }, {'indent' : '+1' }], [{'size' : ['small' , false , 'large' , 'huge' ]}], [{'color' : []}, {'background' : []}], [{'font' : []}], [{'align' : []}], ['clean' ], ] const $editor = document .querySelector ('#editor' )const $statusBar = document .getElementById ('status-bar' )const $btnJoin = document .getElementById ('btn-join' )const $numRoom = document .getElementById ('num-room' )const $btnLeave = document .getElementById ('btn-leave' )const quill = new Quill ($editor, { modules : { toolbar, }, theme : 'snow' , }) let socket = null quill.on ('text-change' , function (delta, oldDelta, source ) { if (source === 'user' ) { const content = quill.getContents () socket && socket.emit ('quill-sync' , JSON .stringify (content)) } }) $btnJoin.onclick = async function ( const room = prompt ('请输入你要进入的房间:' ) if (room) { const response = await fetch (`/join?room=${room} ` ) const token = await response.text () $statusBar.classList .add ('joined' ) $numRoom.innerHTML = room if (!socket) { socket = io ({auth : {token}}) } socket.on ('welcome' , function (word ) { console .log ('welcome:' , word) }) socket.on ('broadcast' , function (word ) { console .log ('broadcast:' , word) }) socket.on ('quill-sync' , function (contentStr ) { contentStr && quill.setContents (JSON .parse (contentStr)) }) } } $btnLeave.onclick = function ( socket.disconnect () socket = null fetch ('logout' ) $statusBar.classList .remove ('joined' ) }
5. 修改server.js:
1 2 3 4 5 6 7 8 9 10 11 12 13 14 15 16 17 18 19 20 21 22 23 24 25 26 27 28 29 30 31 32 33 34 35 36 37 38 39 40 41 42 43 44 45 46 47 48 49 50 51 52 53 54 55 56 57 58 59 60 61 62 63 64 65 66 67 68 69 70 71 72 73 74 75 76 77 78 79 const http = require ('http' )const path = require ('path' )const express = require ('express' )const app = express ()const httpServer = http.createServer (app)const {Server : SocketServer } = require ('socket.io' )const io = new SocketServer (httpServer)app.use (express.static (path.join (__dirname, '../dist' ))) httpServer.listen (3000 , function ( console .log ('\x1b[32m%s\x1b[0m' , '服务启动成功' ) }) const room2content = {}io.on ('connection' , (socket ) => { const authorization = socket.handshake .auth ?.token const userInfo = authorization ? userDict[authorization] : null if (userInfo) { userInfo.socket = socket socket.join (userInfo.room ) socket.emit ('welcome' , `欢迎[${userInfo.name} ]加入房间[${userInfo.room} ]` ) socket.broadcast .to (userInfo.room ).emit ('broadcast' , `[${userInfo.name} ]加入房间[${userInfo.room} ]` ) socket.emit ('quill-sync' , room2content[userInfo.room ] || '' ) socket.on ('quill-sync' , function (contentStr ) { room2content[userInfo.room ] = contentStr socket.broadcast .to (userInfo.room ).emit ('quill-sync' , contentStr) }) socket.on ('disconnecting' , function ( socket.broadcast .to (userInfo.room ).emit ('broadcast' , `[${userInfo.name} ]离开房间[${userInfo.room} ]` ) userInfo.room = null userInfo.socket = null }) } }) const userDict = {}app.get ('/join' , function (req, res ) { const authorization = req.headers .authorization const encodeAuthStr = authorization ? authorization.replace ('Basic ' , '' ) : '' if (encodeAuthStr && encodeAuthStr !== 'logout' ) { const name = Buffer .from (encodeAuthStr, 'base64' ).toString ().split (':' )[0 ] let userInfo = userDict[authorization] if (userInfo) { userInfo.room = req.query .room } else { userInfo = { name : name, room : req.query .room } userDict[authorization] = userInfo } res.send (authorization) } else { res.set ({'WWW-Authenticate' : 'Basic' }) res.status (401 ) res.end () } }) app.get ('/logout' , function (req, res ) { res.status (401 ).end () })
ps:
base鉴权退出登录只要接口返回401即可
完整代码戳这里